How to Trace the Location of an Email Sender in Gmail
Have you ever received a suspicious email and wanted to know where it came from? 🕵️
This quick tutorial will show you how to trace the approximate location of the sender using Gmail and a free online tool.
📩 Steps to Trace Email Location from Gmail
1. Open Gmail
Login to your Gmail account and find the email you want to trace.
2. Open the Email
Click on the email to open it in full view.
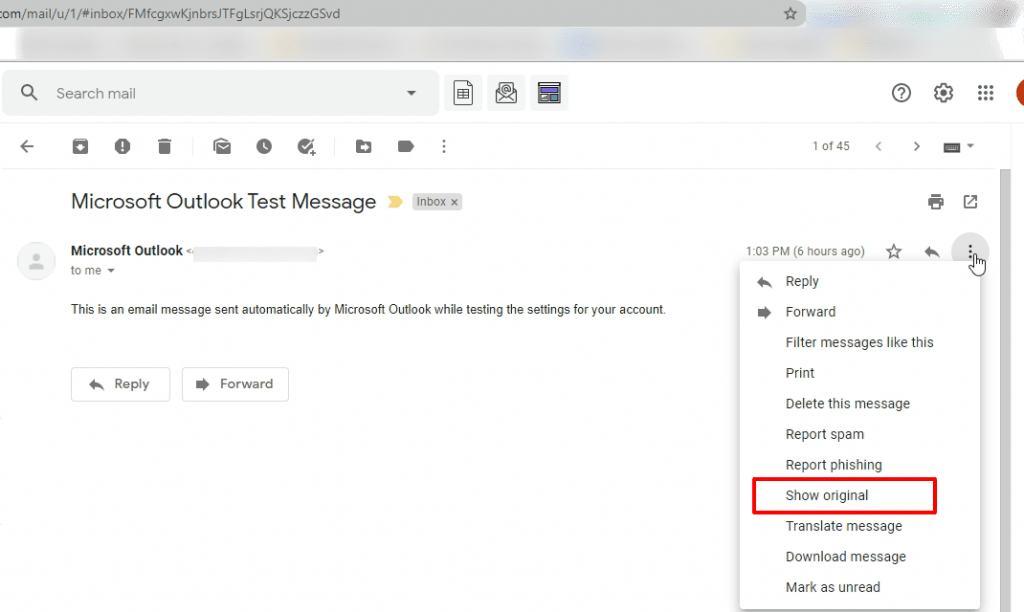
3. Click the 3 Dots (⋮)
On the top-right of the email (next to reply), click the three-dot menu.
4. Click “Show Original”
From the dropdown, select “Show original”.
📺 Watch This Tutorial (YouTube)
You can also follow this video walkthrough:
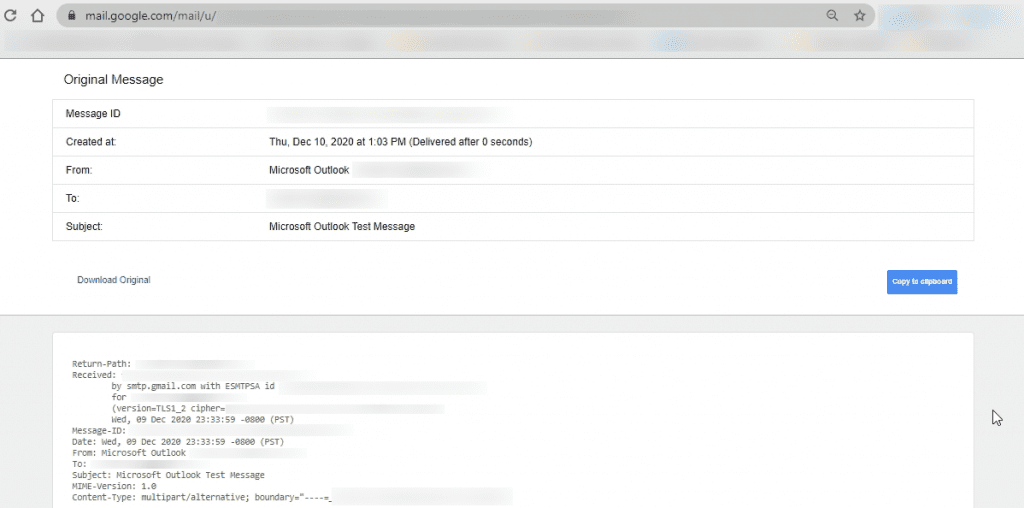
5. Copy Header
Click the “Copy to clipboard” button to copy the full header content.
6. Use Email Tracer Tool
Go to this free email tracer:
🔗 https://www.ip2location.com/free/email-tracer
Paste the header you copied into the form and click Submit.
7. Copy the Coordinates
Once it analyzes the email, it may show IP address details with coordinates (latitude and longitude).
8. Paste on Google Maps
Copy those coordinates and search them on Google Maps to view the approximate sender location.
🛑 Note:
- This method works only if the sender’s IP is visible in the header.
- Most modern email services (like Gmail, Outlook) hide IPs for privacy reasons.
- Still, it’s a useful method for OSINT, cybersecurity investigation, or education.
✅ Conclusion
This is a simple OSINT technique to analyze email headers and trace sender origin. Great for beginners in cybersecurity!
Stay curious, stay safe! 🔐